使用数据增强来提升模型的性能
1、导入模型
|
1 2 3 4 5 6 7 8 |
import os import math import numpy as np import pickle as p import tensorflow as tf from tensorflow import keras import matplotlib.pyplot as plt %matplotlib inline |
2、定义加载函数
|
1 2 3 4 5 6 7 8 9 10 11 12 13 14 15 16 17 18 19 20 21 |
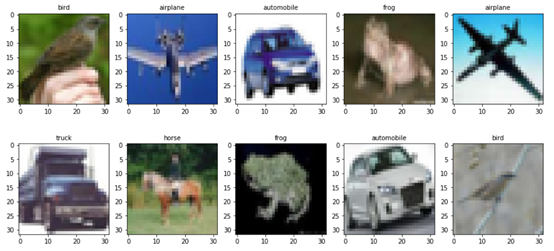
def load_CIFAR_data(data_dir): """load CIFAR data""" images_train=[] labels_train=[] for i in range(5): f=os.path.join(data_dir,'data_batch_%d' % (i+1)) print('loading ',f) # 调用 load_CIFAR_batch( )获得批量的图像及其对应的标签 image_batch,label_batch=load_CIFAR_batch(f) images_train.append(image_batch) labels_train.append(label_batch) Xtrain=np.concatenate(images_train) Ytrain=np.concatenate(labels_train) del image_batch ,label_batch Xtest,Ytest=load_CIFAR_batch(os.path.join(data_dir,'test_batch')) print('finished loadding CIFAR-10 data') # 返回训练集的图像和标签,测试集的图像和标签 return (Xtrain,Ytrain),(Xtest,Ytest) |
3、定义批量加载函数
|
1 2 3 4 5 6 7 8 9 10 11 12 13 14 15 16 17 18 19 20 |
def load_CIFAR_batch(filename): """ load single batch of cifar """ with open(filename, 'rb')as f: # 一个样本由标签和图像数据组成 # (3072=32x32x3) # ... # data_dict = p.load(f, encoding='bytes') images= data_dict[b'data'] labels = data_dict[b'labels'] # 把原始数据结构调整为: BCWH images = images.reshape(10000, 3, 32, 32) # tensorflow处理图像数据的结构:BWHC # 把通道数据C移动到最后一个维度 images = images.transpose (0,2,3,1) labels = np.array(labels) return images, labels |
4、加载数据
|
1 2 |
data_dir = r'C:\Users\wumg\jupyter-ipynb\data\cifar-10-batches-py' (x_train,y_train),(x_test,y_test) = load_CIFAR_data(data_dir) |
把数据转换为dataset格式
|
1 2 |
train_dataset = tf.data.Dataset.from_tensor_slices((x_train, y_train)) test_dataset = tf.data.Dataset.from_tensor_slices((x_test, y_test)) |
5、定义数据增强方法
|
1 2 3 4 5 6 7 8 9 10 11 12 13 14 15 16 17 18 19 20 21 22 23 24 25 26 27 28 29 30 31 32 33 34 |
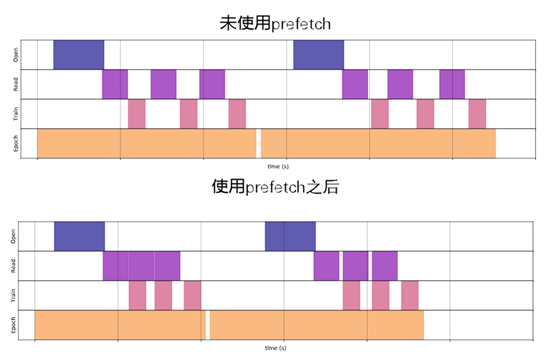
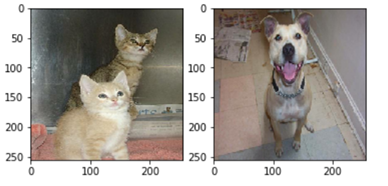
def convert(image, label): image = tf.image.convert_image_dtype(image, tf.float32) return image, label def augment(image, label): image, label = convert(image, label) #image = tf.image.convert_image_dtype(image, tf.float32) image = tf.image.resize_with_crop_or_pad(image, 34,34) # 四周各加3像素 image = tf.image.random_crop(image, size=[32,32,3]) # 随机裁剪成28*28大小 image = tf.image.random_brightness(image, max_delta=0.5) # 随机增加亮度 return image, label batch_size = 64 augmented_train_batches = (train_dataset #.take(num_examples) .cache() # .repeat() .shuffle(5000) .map(augment, num_parallel_calls=tf.data.experimental.AUTOTUNE) .batch(batch_size) .prefetch(tf.data.experimental.AUTOTUNE)) non_augmented_train_batches = (train_dataset .cache() # .repeat() .shuffle(5000) .map(convert, num_parallel_calls=tf.data.experimental.AUTOTUNE) .batch(batch_size) .prefetch(tf.data.experimental.AUTOTUNE)) validation_batches = (test_dataset .map(convert, num_parallel_calls=tf.data.experimental.AUTOTUNE) .batch(2*batch_size)) |
6、构建模型
|
1 2 3 4 5 6 7 8 9 10 11 12 13 14 15 16 17 18 19 20 21 22 23 24 25 26 27 28 29 30 31 32 33 34 |
class MyCNN(tf.keras.Model): def __init__(self): super().__init__() self.conv1 = tf.keras.layers.Conv2D( filters=32, # 卷积层神经元(卷积核)数目 kernel_size=[3, 3], # 感受野大小 padding='same', # padding策略(vaild 或 same) activation=tf.nn.relu # 激活函数 ) self.pool1 = tf.keras.layers.MaxPool2D(pool_size=[2, 2], strides=2) self.conv2 = tf.keras.layers.Conv2D( filters=64, kernel_size=[3, 3], padding='same', activation=tf.nn.relu ) self.pool2 = tf.keras.layers.MaxPool2D(pool_size=[2, 2], strides=2) self.flatten = tf.keras.layers.Reshape(target_shape=(8 * 8 * 64,)) self.dense1 = tf.keras.layers.Dense(units=256, activation=tf.nn.relu) self.dense2 = tf.keras.layers.Dense(units=10) def call(self, inputs): x = self.conv1(inputs) # [batch_size, 32, 32, 3] x = self.pool1(x) # [batch_size, 32, 32, 32] x = self.conv2(x) # [batch_size, 16, 16, 64] x = self.pool2(x) # [batch_size, 8, 8, 64] x = self.flatten(x) # [batch_size, 8 * 8 * 64] x = self.dense1(x) # [batch_size, 256] x = self.dense2(x) # [batch_size, 10] output = tf.nn.softmax(x) return output def model01(self): x = tf.keras.Input(shape=(32, 32, 3)) return tf.keras.Model(inputs=[x], outputs=self.call(x)) |
生成实例
|
1 |
model_no_augment = MyCNN() |
查看模型详细结构
|
1 |
model_no_augment.model01().summary() |
7、编译模型
|
1 |
model_no_augment.compile(optimizer='adam',loss='sparse_categorical_crossentropy',metrics=['accuracy']) |
8、训练模型
为便于比较,这里先不使用数据增强方法
|
1 2 |
epochs = 10 history_non_augment = model_no_augment.fit(non_augmented_train_batches,epochs=epochs,validation_data=validation_batches) |
9、查看运行结果
|
1 2 3 4 5 6 7 8 9 10 11 12 13 14 15 16 17 18 19 20 21 22 23 24 |
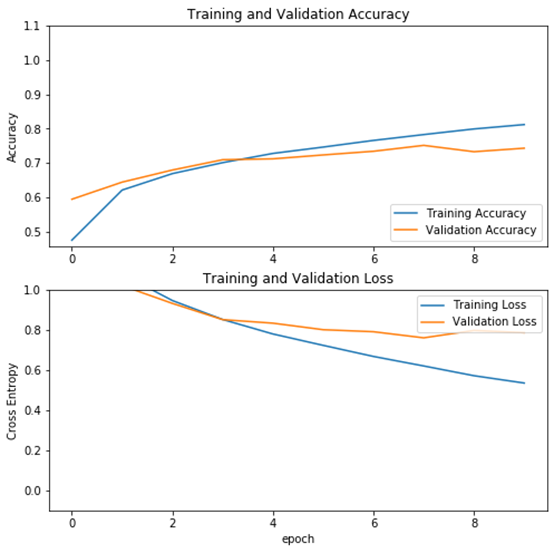
acc = history_non_augment.history['accuracy'] val_acc = history_non_augment.history['val_accuracy'] loss = history_non_augment.history['loss'] val_loss = history_non_augment.history['val_loss'] plt.figure(figsize=(8, 8)) plt.subplot(2, 1, 1) plt.plot(acc, label='Training Accuracy') plt.plot(val_acc, label='Validation Accuracy') plt.legend(loc='lower right') plt.ylabel('Accuracy') plt.ylim([min(plt.ylim()),1.1]) plt.title('Training and Validation Accuracy') plt.subplot(2, 1, 2) plt.plot(loss, label='Training Loss') plt.plot(val_loss, label='Validation Loss') plt.legend(loc='upper right') plt.ylabel('Cross Entropy') plt.ylim([-0.1,1.0]) plt.title('Training and Validation Loss') plt.xlabel('epoch') plt.show() |
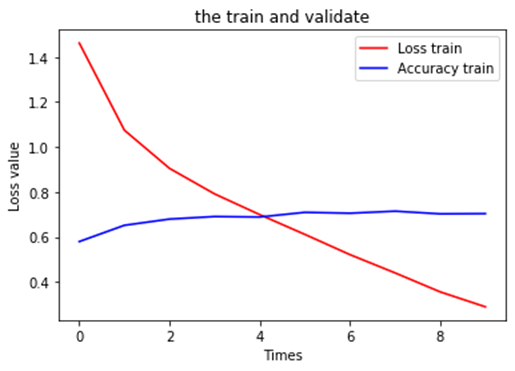
运行结果

10、使用数据增强方法
|
1 2 3 4 5 |
model_augment = MyCNN() model_augment.compile(optimizer='adam',loss='sparse_categorical_crossentropy',metrics=['accuracy']) history_with_augment = model_augment.fit(augmented_train_batches,epochs=epochs,validation_data=validation_batches) |
11、查看使用数据增强的运行结果
|
1 2 3 4 5 6 7 8 9 10 11 12 13 14 15 16 17 18 19 20 21 22 23 24 |
acc = history_with_augment.history['accuracy'] val_acc = history_with_augment.history['val_accuracy'] loss = history_with_augment.history['loss'] val_loss = history_with_augment.history['val_loss'] plt.figure(figsize=(8, 8)) plt.subplot(2, 1, 1) plt.plot(acc, label='Training Accuracy') plt.plot(val_acc, label='Validation Accuracy') plt.legend(loc='lower right') plt.ylabel('Accuracy') plt.ylim([min(plt.ylim()),1.1]) plt.title('Training and Validation Accuracy') plt.subplot(2, 1, 2) plt.plot(loss, label='Training Loss') plt.plot(val_loss, label='Validation Loss') plt.legend(loc='upper right') plt.ylabel('Cross Entropy') plt.ylim([-0.1,1.0]) plt.title('Training and Validation Loss') plt.xlabel('epoch') plt.show() |
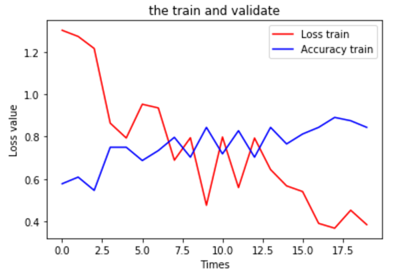
运行结果
12、结果分析
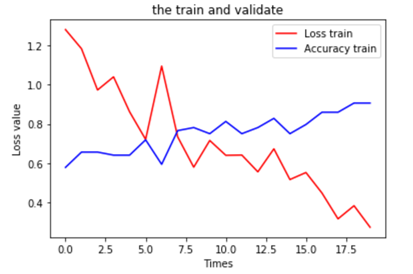
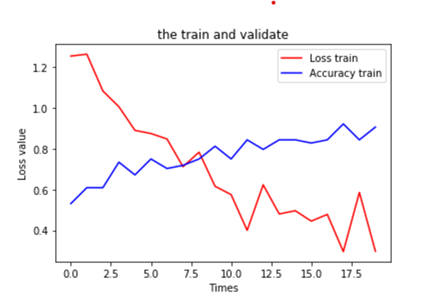
从不使用数据增强与使用数据增强方法的结果可以看出,使用数据增强方法后,模型性能有提升(未使用数据增强的验证精度为71%,使用数据增强方法后,验证精度提升到74%),而且模型的泛化能力也有提高(使用数据增强方法后,训练与验证精度曲线靠得较近)。
